This was a really fun project for me. Back in November of 2008, a staff member at my local GW asked me if I had any ideas on how I would convert a Harad Mumakil from the Lord of the Rings range into a Chaos War Mammoth for Warhammer Fantasy. It turned out he wanted to use one at a campaign weekend the following March, but didn't want to fork out for the Forgeworld one. We discussed a few ideas, ranging from just painting it brown, to gluing flock and static grass to the model to make realistic fur (the idea was debunked by the thought of it moulting in his car...), to sculpting the fur on with Green stuff.
He knew I had done some sculpting projects in the past, with some quite good results, and so asked me if I would be willing to do the model for him as a commision piece. Intrigued by the challenge, I agreed, and so it was that I went home that night with a fully built and undercoated Mumakil, a sculpting tool, and about four packets of Green Stuff.
As soon as I started the sculpting work, I realised that it was going to be a far bigger job than I had thought. Looking at it, as I began putting a matted, almost wooly texture up the back legs, two things hit me at once; first, the fur was all wrong for doing the whole model, second, I had started having ideas on how a mammoth should look, and the Mumakil just wasn't it. The main problem was the head... it was the wrong shape, the ears were too low down, and the eyes were far too small. And so it was that what should have been a three week sculpt grew to (pun intended) mammoth proportions.
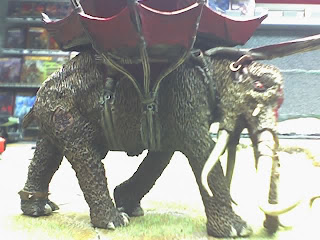
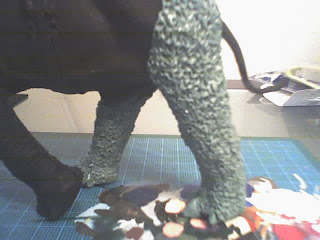
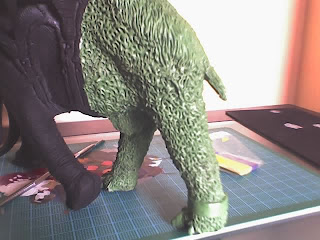
To fix the fur, I took the original, matted texture up the legs... the technique involves pushing into the Green Stuff at an upward angle in small increments, working it into flowing, hairy shapes. Use the pictures below to get an idea of what I mean. A second layer was then added, working from the top down, shaped to look like longer strands of hair. The two-tone effect was quite pleasing, giving the model a look of being steadily more matted and messy the nearer to the ground it gets.
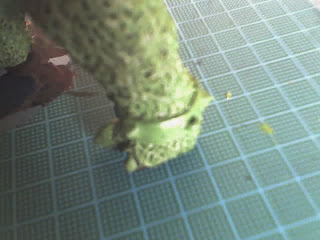
A spiked collar was added to one of the back legs, first by sculpting the ring, then adding the spikes and a chain ring after it had dried. Claws were added, as well as decorative banding on the tusks. Then came the biggest challenge of the lot... the head.
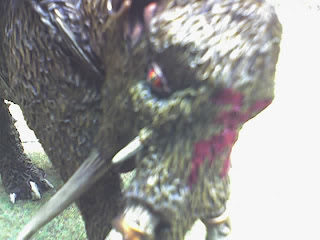
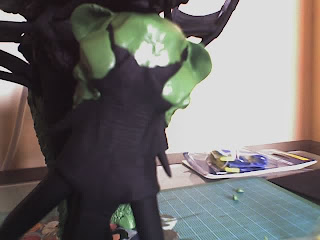
The top of the head was built upon, adding height and making a new shape. The ears were next, pushed roughly into shape with my thumbs, before the inner shapes were added. The really tricky bit, though, was the eyes. These were made by first making a ball of Green Stuff, then letting this dry. Once fully hard, the ball was then cut in two, to make the eyeballs themselves. A cushion of Green Stuff was added to each side of the head; the 'eyeballs' were pushed into this cushion, then using a sculpting tool the Green Stuff was pulled around the half-spheres to make the eyelids, which were then sculpted around, adding various lines and creases. Hair was then sculpted on to the head, bringing the rest of the head more into proportion, as the eyes did stick out a bit.
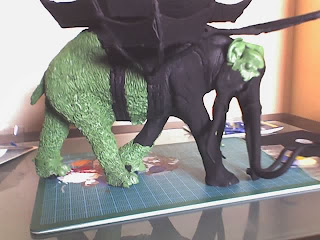
After that, I added some small extra details, such as the ring in the Mammoth's right ear, and a patch of bare skin on it's back end with a Chaos Star branded into it. All in all, I was very pleased with the result... if nothing else, it was a definite learning curve, and I never would have said it would turn out half as well when I started; it just goes to show that you don't know what you can acheive until you try. Here are the progress pics I took at the time (taken on my mobile, so I apologise for the poor quality), and then I'll put in a painting guide and the finished article pics. Enjoy!


And here are some shots of the finished article. The fur was painted first, by spraying on Calthan Brown with an airbrush. The model was then drybrushed with Khemri Brown, followed by patches of Snakebite Leather, to give the model an uneven, dirty feel. The ropes, wood, and wicker flooring in the howdah were painted Scorched Brown, the ropes drybrushed Snakebite Leather, then all of the surfaces drybrushed in Bleached Bone. The colours for the ropes were used for the tusks and claws, but these were layered on, starting with thin stripes near the top of the ivory parts, moving into block colours further down.
The cloth sides of the howdah were painted Mechrite red, then highligthed with Blood Red. Then pretty much the whole model, barring the flesh, ropes and eyes, were given a generous coating of Devlan Mud, after which the tusks and claws recieved another layer of Bleached Bone. The flesh was then painted, starting with a mixture of Scorched Brown and Dwarf Flesh, then Dwarf Flesh on its own, before adding a bit of Bleached Bone to the colour for a final highlight.
Lastly came the details. The rings and hooks around the howdah's ropes were painted Boltgun Metal, highlighted with Chainmail. Brazen Brass was used to paint the bronze sections, highlighted with Burnished Gold, then washed with Devlan Mud. The eyes were highlighted from Scab Red to Red Gore to Blood Red, the iris was painted on in Chaos Black, then streaks of Blazing Orange followed by Sunburst Yellow were added around the iris to add a bit of life.
Last, but not least, I decided to have a bit of extra fun, and hand painted a series of Chaos runescript around the inside of the howdah, using the alphabet from the Warriors of Chaos army book. I don't know if he ever translated them, but they spelled out the opening lines of the song 'Nelly The Elephant'! Well, it gave me a chuckle, at any rate.
So there you have it, one Chaos War Mammoth. And it only took me about three months to complete... I don't think I'll be doing another for quite some time! Let us know what you think, all comments welcome.
~MyBlueOblivion